

Table of Contents
- What Larger Athletes Should Look For in Triathlon Gear
- Tri-Suit Sizing and Fit for Bigger Body Types
- One-Piece vs Two-Piece Tri-Suits for Larger Athletes
- Preventing Chafing in Triathlon: Seams, Chamois and Anti-Friction
- Triathlon Wetsuit Fit Guide for Larger Swimmers
- Sprint vs Long-Distance Kit: What Changes Over 70.3 and Ironman
- Gear Modifications and Confidence on Race Day
- Frequently Asked Questions
Last Updated: September 19, 2026
What Larger Athletes Should Look For in Triathlon Gear
Most sizing advice for triathlon gear assumes a lean, narrow frame. That assumption leaves a lot of athletes underserved. Triathlon gear for larger athletes is built around three things: stretch that recovers, seams that sit where they won't rub, and panels placed to support rather than compress the wrong areas.
Seam Placement, Panels and Stretch
Flatlock seams matter more than almost any other construction detail. Raised seams create friction points, and friction points become raw skin over a long ride.
Look for:
- Flatlock or bonded seams at the crotch, inner thigh and underarm
- Four-way stretch fabric that returns to shape rather than sagging
- Panels cut to follow body contours, not just scaled up from smaller sizes
- A chamois sized for your sit bones, not a one-size pad
Tri-Suit Sizing and Fit for Bigger Body Types
The right tri-suit size is the one that stays put through all three disciplines. If your suit rides up in the swim or bunches on the bike, it's the wrong cut, not the wrong body.
Reading a Sizing Chart When You Sit Between Sizes
When chest and waist measurements point to different sizes, go with the size that matches your torso length and chest, then check the stretch rating of the fabric. Higher-stretch fabrics forgive a centimetre or two; low-stretch race fabrics do not.
One-Piece vs Two-Piece Tri-Suits for Larger Athletes
Two-piece suits win on fit flexibility and comfort breaks. One-piece suits win on aerodynamics and no midriff gap in the water.
Option |
Best For |
Trade-off |
|---|---|---|
One-piece |
Sprint and Olympic racing, aerodynamics |
Harder nature breaks, less size flexibility |
Two-piece |
Long course, comfort breaks, mixed sizing |
Slight gap risk if the top rides up |
Preventing Chafing in Triathlon: Seams, Chamois and Anti-Friction
Chafing is the number one comfort complaint from larger triathletes, and it is almost never caused by sweat alone. It is caused by three forces working together: friction between fabric and skin, friction between skin folds, and pressure that pins fabric against the body in one spot for hours. Understanding which of those is causing your problem is what separates a fix from a temporary patch.
Where Larger Athletes Actually Chafe
The friction points change with body shape, but the same handful of zones come up again and again:
- Inner thigh and groin, the highest-friction area on the bike, made worse by a chamois that creases or a saddle that pushes the leg inward.
- Underarm and side of the chest, common in one-piece suits where the armhole edge sits against the lat or the edge of the chest.
- Neckline and collarbone, mostly a wetsuit issue, where a gaping neck seal rubs with every stroke.
- Waistband and midriff, a two-piece suit that rides up creates a fold of fabric that saws against the skin.
- Bra strap and underband line, for athletes wearing a separate sports bra under a two-piece, the underband is a frequent culprit over long distances.
Seams, Chamois and Fabric: What to Check
Seam placement matters more than seam count. Flatlock and bonded seams sit flush against the skin, while overlocked or raised seams create a ridge that becomes a friction point within the first hour.
Look for:
- Flatlock or bonded seams at the crotch, inner thigh and underarm
- A chamois that is wide enough to cover your sit bones without folding at the edges
- Multi-density or multi-thickness padding rather than a single slab, so pressure is spread rather than concentrated
- A chamois with a smooth, seamless surface against the skin, stitched channels are a common irritation source
- Four-way stretch fabric that returns to shape rather than sagging into folds
Anti-Friction Tactics That Hold Up Over Five Hours
- Apply anti-chafe balm to the inner thigh, underarm, neckline and any bra-line contact point before the swim. Balm applied after the swim is already too late for the first hour on the bike.
- Choose a balm that stays put in water. Water-resistant formulas survive the swim; water-soluble ones do not.
- Check the chamois does not crease when you are in the aero position, not just when standing. Creases only appear under load.
- Avoid cotton anything in training. Moisture-wicking technical fabric only.
- Reapply balm at T2 if you are racing long, and carry a small stick in your transition bag or bento box.
- Wash kit after every session. Salt and detergent residue left in seams is a hidden irritant.
Modifications That Help
- If a seam sits wrong, a tailor can often move or cover it with a soft binding for a modest cost.
- Anti-chafe shorts or a thin seamless liner under a two-piece suit can eliminate bra-line and waistband rubbing.
- Chamois cream applied directly to the pad (not just the skin) reduces friction between fabric and skin as well as skin and skin.
- For athletes with a pronounced thigh taper, a slightly longer short leg reduces how much the hem rides up into the groin.
Triathlon Wetsuit Fit Guide for Larger Swimmers
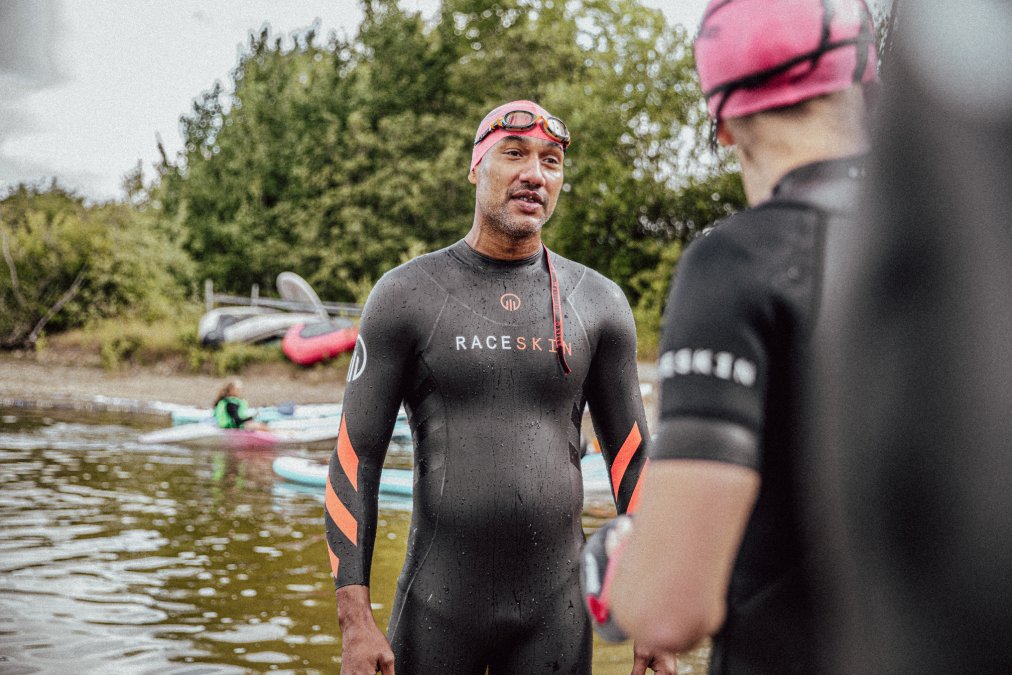
A triathlon wetsuit fit guide for larger swimmers starts with the same rule as tri-suits: fit the torso and shoulders, not just the chest. Neoprene stretches, but it stretches unevenly if the panels are not cut for your shape. A wetsuit that is right in the chest but wrong in the torso will either choke you at the neck or balloon at the lower back, and both cost you time and comfort in the water.
Measure Before You Buy
Wetsuit sizing charts are built around height, weight, chest and waist. For larger athletes, the two measurements that decide fit are torso length and shoulder circumference, and they are the two most charts underweight. Achieving a comfortable range of motion in the water requires prioritizing these anatomical proportions over standard sizing, much like the process of selecting flattering extended sizing for your post-race wardrobe.
Measure and write down:
- Torso length, from the base of the neck to the crotch, taken standing straight
- Chest, at the fullest point, arms down
- Waist, at the natural waist, not the hip
- Shoulder circumference, around both shoulders at the widest point, arms relaxed
- Height and weight, as a cross-check against the chart, not as the primary guide
How Panel Patterns Affect Fit
Most wetsuit ranges are built around a small number of panel patterns, and those patterns are usually designed on a leaner frame. The result is that a larger athlete can be between sizes in a way the chart does not acknowledge.
What to look for in the panel layout:
- Shoulder and arm panels cut with enough stretch to allow full arm rotation without pulling the neckline
- Chest and back panels that follow the torso rather than scaling up a smaller pattern
- A gusseted crotch so the suit does not bunch when you are horizontal
- A neckline that sits flat against the collarbone without gaping or pressing on the throat
- A zip that runs smoothly and sits flush against the spine, with a soft guard at the top
Try-Before-You-Buy Where You Can
Size-inclusive wetsuit ranges exist, but they are still built around a limited number of panel patterns. Where possible:
- Try the suit on over a thin tri-suit or swim skin, not bare skin, to simulate race conditions
- Do a full arm-rotation test and a simulated catch, if the shoulder pulls, size or cut is wrong
- Check the neckline in a mirror while looking down, as you would sighting in open water
- If buying online, confirm the returns policy covers wetsuits and whether the suit must be unworn
- Ask whether the brand offers a fit consultation or a size exchange, which is common in the better ranges
Race-Day Checks
Before you commit to a wetsuit for a race, do at least one open-water session in it. Check the neckline after 200 metres, the shoulders after 800 metres, and the lower back when you stand up. If any of those three areas is uncomfortable, the suit will not improve over 1,900 metres.
Sprint vs Long-Distance Kit: What Changes Over 70.3 and Ironman
Sprint racing rewards aerodynamics and quick transitions. Long-distance racing rewards durability, storage and sustained comfort. The kit that wins a sprint will punish you over 70.3 or Ironman.
What changes as distance increases:
- Chamois depth and density go up for longer saddle time
- Pocket capacity matters more for nutrition over five-plus hours
- Full-length or longer zips help with heat management and nature breaks
- Fabric weight shifts toward breathability over pure compression
Gear Modifications and Confidence on Race Day
Confidence on race day is a gear problem more often than athletes admit. If you're tugging at your suit in T1, you're not racing, you're managing clothing.
Small modifications that make a real difference:
- Take your kit to a tailor for minor seam adjustments if a panel sits wrong
- Test every piece in a full dress rehearsal at race pace, not just in training
- Break in new kit over at least three sessions before race day
- Carry a spare anti-chafe balm in your transition bag
Frequently Asked Questions
Should I size up or down for a tri suit?
Size to your largest measurement, not your usual clothing size. Tri suits are cut to sit tight against the skin, so a suit that feels loose in the shop will bunch in the water and ride down on the bike. Check the sizing chart against chest, waist and torso length, then size up if you fall between two sizes. A slightly longer torso panel matters more than a smaller waist number. If you are between sizes on the shoulders, go up, because restricted shoulder rotation costs you more time than a marginally looser fit.
What features should larger athletes look for in a tri-suit?
Prioritise four things: flatlock or bonded seams positioned away from the inner thigh, a longer torso panel so the suit does not pull at the crotch, wide leg grippers that stay flat instead of rolling, and a full-length front zip for easier nature breaks and heat dumping. Fabric with good stretch and moisture-wicking properties keeps the suit close without digging in. Raceskin's Premium Tri Suit uses a full-length opening zip, a long-distance tri pad and side mesh panels, which suits bigger athletes racing long course.
How do I prevent chafing during long-distance triathlon events?
Chafing usually comes from three things: a seam in the wrong place, fabric that holds moisture, and skin rubbing against skin. Choose a suit with anti-friction seam placement at the inner thigh and underarm, apply a chamois cream or anti-friction balm before the swim, and reapply in transition two if the race allows it. Rinse salt and sand out of the suit after each training session. If a specific seam keeps rubbing, a thin layer of balm on that seam line before you dress solves more problems than changing your whole kit.
Should I size up or down when buying a triathlon wetsuit?
Size to your chest and torso measurements first, then check the height range. A wetsuit should feel snug around the torso but leave the shoulders and arms free to rotate through the full stroke. If you are between sizes and broad across the chest, go up a size and accept slightly more room in the legs. A suit that is too tight across the chest restricts breathing, which is far worse over 1.9 km than a marginally looser fit around the calves.
Triathlon gear for larger athletes shouldn't be a compromise. If your kit fits properly, you stop noticing it, and that's when you race at your best. Raceskin builds apparel tested in real training and racing conditions, with a dedicated designer for custom club and team kit and a feedback loop with elite athletes that shapes every revision. Get race ready with Raceskin and stop managing your clothing mid-race.