

Table of Contents
- Why Seam Rubbing Starts in the First Place
- Your Cycling Shorts Fit Guide: Sizing That Stops Rubbing
- Seam Placement and Fabric: What to Look For
- Chamois Cream for Cycling: Where and How Much to Apply
- Saddle Sores Prevention: Catching Irritation Early
- How to Wash Cycling Shorts Without Damaging Seams
- A Step-by-Step Fit Check You Can Do Mid-Ride
- Frequently Asked Questions
Last Updated: October 20, 2026
Why Seam Rubbing Starts in the First Place
Seam rubbing in cycling shorts is friction between a raised stitch line and your skin, made worse by sweat, movement and a poor fit.
Think of it as three layers. Your skin moves against the fabric. The fabric moves against the pad. The pad moves against the saddle.
Here is the uncomfortable truth most guides skip: a seam only rubs when something else has already shifted.
The Four Sources of Friction
Every case of seam rubbing traces back to one of four sources:
- Fit: shorts that are too loose bunch and crease
- Placement: a seam sitting where your leg repeats the same motion
- Moisture: damp fabric grips and drags instead of gliding
Diagnose the source before you buy anything new. Otherwise you are guessing.
Your Cycling Shorts Fit Guide: Sizing That Stops Rubbing
A good cycling shorts fit guide starts with measurements, not guesswork. Shorts that gap at the leg or ride up at the waist create folds, and folds rub. Snug, even contact is what you want.
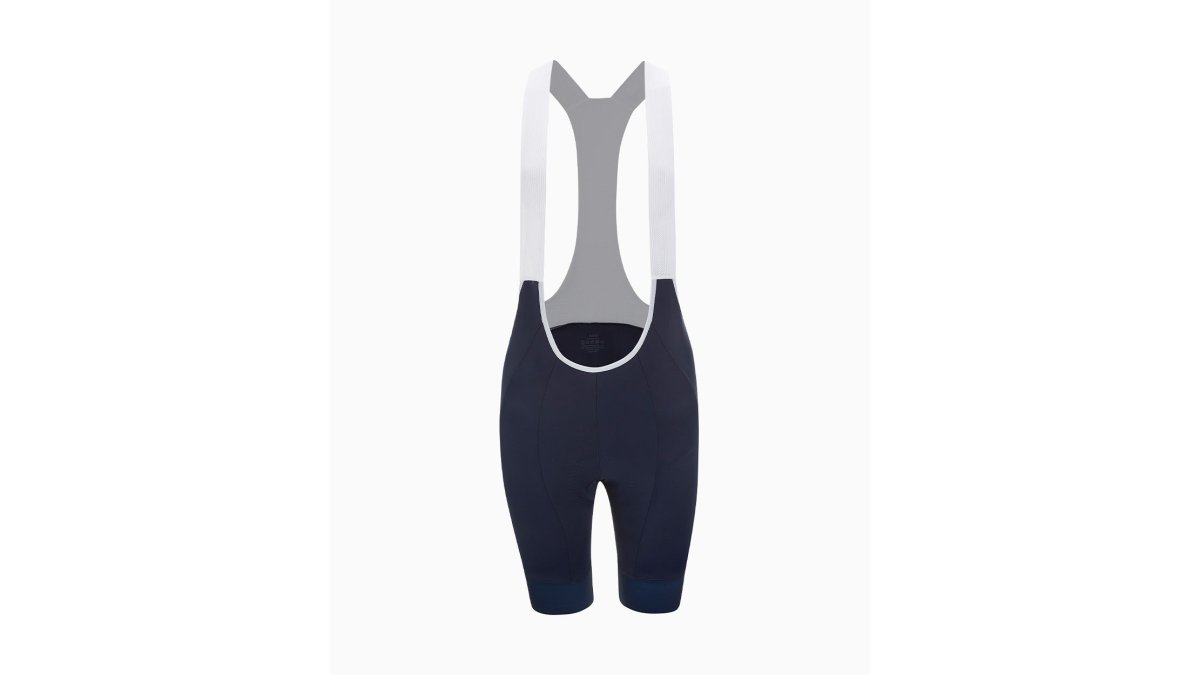
Sizing varies between brands, so always check the maker's own chart. Our Premium Bib Shorts and Women's Elite Bib Shorts pages list the sizing detail for each cut.
Measure Before You Buy
Take three measurements with a soft tape, standing relaxed:
- Waist: at the narrowest point, level with your navel
- Hips: at the widest point, feet together
- Inseam: floor to crotch, without shoes
Write them down and compare against the brand's chart, not your usual jeans size. If you sit between two sizes, size down for a race fit and up for endurance comfort.
Seam Placement and Fabric: What to Look For
Flat seams and low-profile stitching are the single biggest clothing fix for seam rubbing. A raised seam under a moving leg is a rasp. A flat-lock seam sits almost level with the fabric and barely registers. But "flat-lock" on a product page tells you very little on its own. Here is how to read construction properly and check it in your hands before you buy.
Know Your Seam Types
- Flat-lock (flatlock): two fabric edges are butted together and stitched with a cover stitch that lies flat on both sides. It is the standard for inner-thigh and seat panels because there is no raised ridge to catch skin. Look for a dense, even stitch with no puckering.
- Overlock (serged): edges are wrapped and stitched, leaving a raised, slightly bulky ridge. Fine on outer panels and hems, but a poor choice where your leg repeats the same motion against the saddle.
- Hidden or bonded seams: the stitch is turned inside or replaced with an adhesive bond so the outer face is smooth. Excellent against skin, but check that the bond is flexible, a stiff bonded seam can crack with repeated washing.
Panel Layout and Seam Direction
Fewer panels generally means fewer seams, but placement matters more than count. A well-designed short routes seams away from the sit-bone contact patch and the inner-thigh sweep. Run a fingertip along each seam and ask three questions:
- Does it cross the contact zone? A seam running directly under your sit bones will be loaded on every pedal stroke.
- Does it run with or against your leg motion? A seam parallel to the leg's sweep rubs less than one crossing it at an angle.
- Is it flat on the inside? Turn the shorts inside out. The face that touches skin is the one that matters, not the outer finish.
Fabric Stretch and Recovery
Fabric stretch is the other half of the story. A fabric that stretches evenly in all directions follows your leg instead of creasing against it. Cheap, stiff panels fold at the seam line, and that fold is what bites. Look for four-way stretch in the seat and inner thigh, and check recovery, stretch a panel gently and let go; if it stays baggy, it will bunch when damp.
Leg Grippers and Hem Finish
A gripper that pinches creates a new pressure line; one that is too loose lets the hem ride up and bunch. Look for a wide, silicone-dotted band or a laser-cut hem with a silicone print, and check that the gripper sits flat when you pull the short on. A rolled or twisted hem is a rub waiting to happen.
The Women's Elite Bib Shorts use flat-lock and hidden stitches with a shock-absorbing seat pad, built to hold a stable fit and reduce chafing. That construction matters more than any cream you can buy.
Chamois Cream for Cycling: Where and How Much to Apply
Chamois cream for cycling is a lubricant you apply to skin or pad to reduce friction. Use a thin, even layer, not a thick scoop.
Apply it in three places:
- The seam lines where fabric meets skin
- The sit-bone contact points on the pad
- Any hot spot you already know about
An anti-chafing stick works better for shorter rides and quick top-ups. A cream suits long days and damp conditions.
Here is the part most riders get wrong: cream is a bridge, not a fix. It buys you comfort while you sort out fit and seams.
Saddle Sores Prevention: Catching Irritation Early
Saddle sores prevention comes down to three habits: dry skin, clean shorts and quick action at the first sign of rubbing. A small hot spot becomes a raw patch fast on a long ride. But most guides stop at prevention. The harder question, and the one that decides whether you lose a week off the bike, is what to do once irritation has already started.
Know What You Are Dealing With
Not all saddle discomfort is the same, and the right response depends on which you have:
- Friction rub (chafing): superficial redness or a raw patch where fabric or skin has rubbed. Usually responds to stopping the friction and protecting the skin.
- Folliculitis: small, tender bumps around hair follicles, often from sweat and bacteria trapped in damp shorts. Needs cleanliness and, if it spreads, medical advice.
- A developing saddle sore (nodule): a deeper, firm, painful lump under the skin. This is the one to take seriously, do not squeeze or pick it, and seek medical advice if it grows, becomes hot, or you develop a fever.
The Stop-Clean-Protect-Escalate Protocol
If you feel a hot spot mid-ride, act in this order:
- Stop and adjust. Pull over somewhere safe. Shift your position, stand on the pedals for a stretch, or loosen anything pinching. Ignoring it for another hour is how a minor rub becomes a week off the bike.
- Clean gently. When you finish, change out of damp shorts immediately and wash the area with lukewarm water and a mild, unperfumed cleanser. Pat dry, do not rub.
- Protect. Keep the area dry and let air get to it. A thin barrier cream can reduce friction on the next ride, but do not apply heavy ointment to broken skin without advice.
- Escalate if needed. If skin has broken, NHS guidance on caring for sore or broken skin is a sensible reference. Do not ride on open skin. Seek medical advice if you see spreading redness, swelling, heat, pus, or feel unwell, signs that an infection may be developing.
Prevention Habits That Actually Hold Up
- Change out of damp shorts as soon as you finish. Sitting around in sweat-soaked fabric is a common mistake that turns a small rub into a real problem.
- Wash shorts after every ride and dry them fully before storage.
- Build saddle time gradually after a break; sudden long rides are a common trigger.
Watch for these early signals: a warm, tender patch after a ride, redness that lasts more than an hour, or any stinging when you sit down. Treat them as a prompt to act, not a badge to ride through.
How to Wash Cycling Shorts Without Damaging Seams
Knowing how to wash cycling shorts properly protects the seams that keep you comfortable.
Follow this routine:
- Wash after every ride, not every few rides
- Cold or cool water, never hot
- No fabric softener, which coats the fabric and kills wicking
Use a mesh laundry bag if you wash kit with other items. Zip zips and close any hooks so nothing snags the fabric.
Inspect seams every few washes. A loose thread or lifted stitch is your early warning. Repair it or retire the shorts before it starts rubbing.
A Step-by-Step Fit Check You Can Do Mid-Ride
A mid-ride fit check takes two minutes and catches problems before they become sores. Pull over somewhere safe and work through these steps in order.
- Stand and reset. Let the shorts settle, then sit back down squarely on the pad.
- Check pad alignment. The pad should sit centred under your sit bones, not bunched forward.
- Feel the leg hem. Leg grippers should sit flat with no roll or gap.
- Smooth the inner thigh. Run a hand along each seam to flatten any fold.
- Pedal easy for a minute. Notice any drag or heat at a specific point.
- Adjust the saddle if needed. A small tilt change can move pressure off a hot spot.
- Note the spot. If rubbing returns in the same place, that is your diagnosis.
If a seam keeps rubbing after all seven steps, the shorts are the likely cause.
Seam rubbing is rarely random. It comes from a loose fit, a raised stitch, damp fabric or a position that pushes you onto an edge, and each one has a fix.
At Raceskin, we build kit for the long hours that expose every weak point: sweat-wicking fabrics, flat-lock and hidden stitching, and a fit tested in real training and racing. Our Premium Bib Shorts, Women's Elite Bib Shorts and Women's Pro Bib Shorts all put comfort first, and our team can build custom club kit with a dedicated designer.

Get race ready and ride without thinking about your shorts.
Frequently Asked Questions
How can I stop cycling shorts seams from rubbing?
Start by checking fit: shorts that are too loose let fabric move against your skin, while shorts that are too tight pull seams into creases. Look for flat-lock or hidden stitching and a chamois that sits flush with no ridges. Apply a thin layer of chamois cream to contact points before long rides, and wash shorts after every use so salt and grit do not turn into abrasive paste. If a seam still rubs, the cause is usually the seam's position rather than your skin, so try a different short before blaming your saddle.
Should you wear underwear under cycling shorts?
No. Underwear adds a second layer of fabric with its own seams, and those seams move against your skin with every pedal stroke. Cycling shorts are designed to be worn directly against the skin, with the chamois pad providing the cushioning. Wearing underwear also traps moisture, which softens skin and makes chafing more likely. If you feel exposed without underwear, choose bib shorts with a higher waist or a longer leg, not a second layer.
Does vaseline or petroleum jelly stop thigh chafing when cycling?
Petroleum jelly reduces friction, but it is greasy, transfers onto shorts and saddles, and can degrade some fabrics over time. It also does not breathe, which traps sweat against the skin on long rides. A purpose-made chamois cream or anti-chafing stick is formulated to stay in place, wash out of kit, and work with moisture-wicking fabrics. For short commutes petroleum jelly can work in a pinch, but for rides over an hour a dedicated product is the better choice.
How do you prevent saddle sores on long rides?
Saddle sores prevention comes down to four habits: wear clean shorts every ride, get the fit right so the chamois does not bunch, use chamois cream on rides over an hour, and stand out of the saddle every 15 to 20 minutes to restore blood flow. Wash shorts immediately after riding, dry them fully, and replace them when the pad flattens or seams fray. If a sore develops, take a few days off the bike and keep the area clean and dry rather than riding through it.