

Table of Contents
- Why Open Water Swimming Training Plans Differ From Pool Sets
- Plan 1: The Pool-to-Open-Water Transition Plan
- Plan 2: Open Water Swimming Acclimatisation for Cold Water
- Plan 3: Sighting Techniques for Open Water Practice
- Plan 4: Endurance and Interval Training for Open Water Swimming
- Plan 5: Essential Open Water Swimming Gear for Beginners
- Plan 6: How to Improve Shoulder Mobility for Swimming
- Plan 7: Race Day Preparation and Post-Swim Recovery
- Frequently Asked Questions
Last Updated: September 16, 2026
Why Open Water Swimming Training Plans Differ From Pool Sets
Open water swimming is the practice of swimming in natural bodies of water such as lakes, rivers, and the sea, where conditions change constantly and no lane ropes define your path. This guide from Raceskin breaks down seven training plans built specifically for beginners making that transition.
What Changes When You Leave the Lane Ropes
Pool sets run on predictable intervals, clear visibility, and a wall every 25 metres. Open water removes all three. You cannot push off, you cannot see the bottom, and the water temperature sits well below a heated pool. According to guidance from the Royal National Lifeboat Institution on open water safety, cold water and hidden currents are the two hazards that catch new swimmers first.
Plan 1: The Pool-to-Open-Water Transition Plan
The best starting point is a four-week block that keeps two pool sessions and adds one short open water session per week. Keep the open water swims to 10-15 minutes at first, focusing on comfort rather than distance.
Indoor-to-Outdoor Drills to Build Open Water Confidence
- Heads-up front crawl: swim 25 metres with your eyes forward, no breathing to the side. Builds the neck position sighting requires.
- No-wall turns: touch and go without pushing off. Removes your reliance on the wall.
- Treading water: 2 minutes without touching the bottom. Essential for starts and panic management.
- Bilateral breathing sets: breathe every three strokes to prepare for chop on either side.
Plan 2: Open Water Swimming Acclimatisation for Cold Water
Cold water acclimatisation is the gradual process of adapting your body to lower water temperatures through repeated, short exposures. It is the single most important plan for anyone swimming outside between spring and autumn, and it is the one most beginners rush.
A Four-Week Progressive Exposure Schedule
The principle is simple: short, frequent, controlled exposure beats one long, miserable swim. Build the habit before you build the distance.
Week |
Frequency |
Time in water |
Focus |
|---|---|---|---|
1 |
2 sessions |
3-5 min |
Entry, breathing control, exit |
2 |
2-3 sessions |
6-8 min |
Add gentle front crawl |
3 |
3 sessions |
10-12 min |
Continuous easy swimming |
4 |
3 sessions |
15-20 min |
Sustained swim with sighting |
Reading the Water Before You Get In
Water temperature, not air temperature, drives your risk. As a working rule, water below about 15°C demands a short session and a wetsuit for most beginners; below about 10°C it is a specialist activity, not a beginner one. Local clubs and outdoor swimming venues publish current readings, and a simple pool thermometer on a cord gives you a reading at the bank.
- Wind chill and chop: a flat 14°C lake and a windy 14°C lake are different experiences. Wind strips heat far faster.
- Recent rain: runoff can drop temperature and carry pollutants into rivers and lakes.
- Your own history: if you shivered for an hour after the last swim, cut the next one short rather than pushing through.
Cold Water Shock and Hypothermia: What Actually Happens
Cold water shock hits in the first 60 seconds: gasping, rapid breathing, and a spike in heart rate. This is a physiological reflex, not a sign of poor fitness, and it is the reason so many beginners panic on entry. The response is to float on your front or back, keep your head clear of the water, and breathe out slowly until the urge to gasp passes.
Rewarming Protocol After Every Cold Swim
- Get out of wet kit immediately and towel dry, patting rather than rubbing.
- Layer up from the inside out: base layer, fleece, windproof shell, hat, gloves, socks.
- Drink something warm and eat something with carbohydrate.
- Keep moving gently. Do not sit still in a cold car.
- Warm the core first. A hot shower on cold limbs can be uncomfortable and slows the rewarming of your centre.
The safety advice from the National Water Safety Forum recommends swimming with others and never alone in unfamiliar water, and the guidance from the Royal National Lifeboat Institution on open water safety is worth reading before your first cold-water session of the season.
Plan 3: Sighting Techniques for Open Water Practice
Sighting is the technique of lifting your eyes forward during front crawl to check your direction without breaking stroke rhythm. Get it right and you swim the shortest line between two points.
Plan 4: Endurance and Interval Training for Open Water Swimming
Endurance training for open water swimming builds the aerobic capacity to hold pace for 30-90 minutes without a wall to rest on. Interval training sharpens the top end.
Building Aerobic Capacity With the 80/20 Approach
The 80/20 approach means roughly 80% of your training volume sits at an easy, conversational pace and 20% at hard effort. Beginners usually invert this and plateau. A simple weekly structure:
Session |
Focus |
Duration |
Effort |
|---|---|---|---|
Pool interval |
Stroke rate and pace |
30-40 min |
Hard |
Open water steady |
Aerobic capacity |
40-60 min |
Easy |
Technique session |
Sighting and drills |
20-30 min |
Easy |
Plan 5: Essential Open Water Swimming Gear for Beginners
Essential open water swimming gear for beginners covers four items: a wetsuit, goggles, a swim cap, and a safety buoy. Everything else is optional.
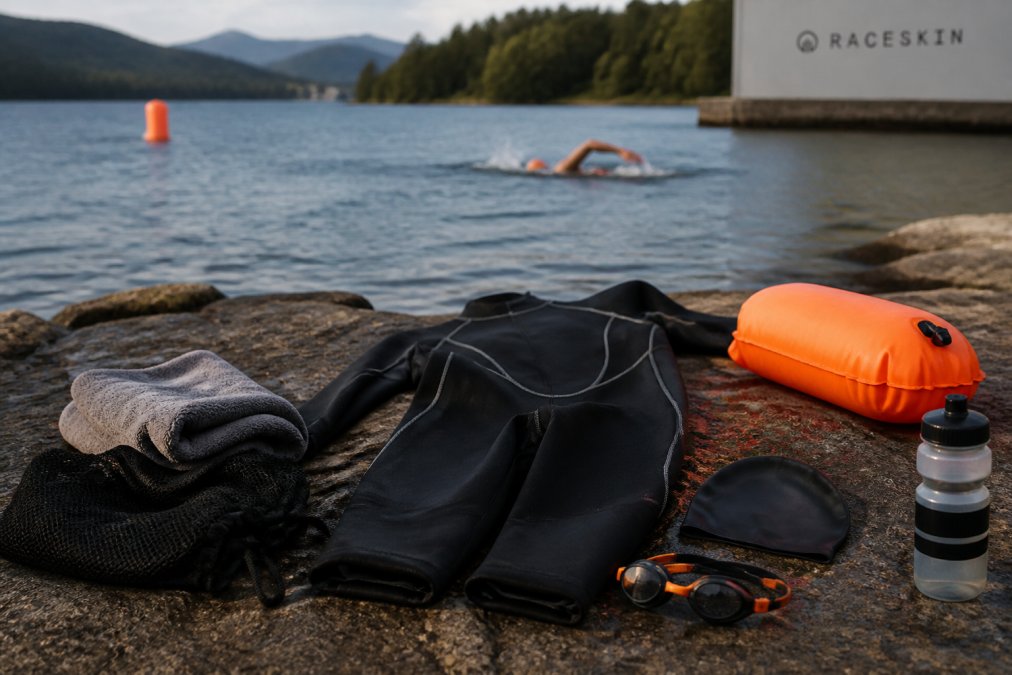
Essential swim equipment
Wetsuit Care and Equipment Maintenance
Rinse your wetsuit in fresh water after every swim. Salt and chlorine degrade neoprene over time. Dry it inside out, away from direct sunlight, and store it folded loosely rather than hung by the shoulders. Goggles should be rinsed and air-dried, never wiped with a towel, which scratches the anti-fog coating.
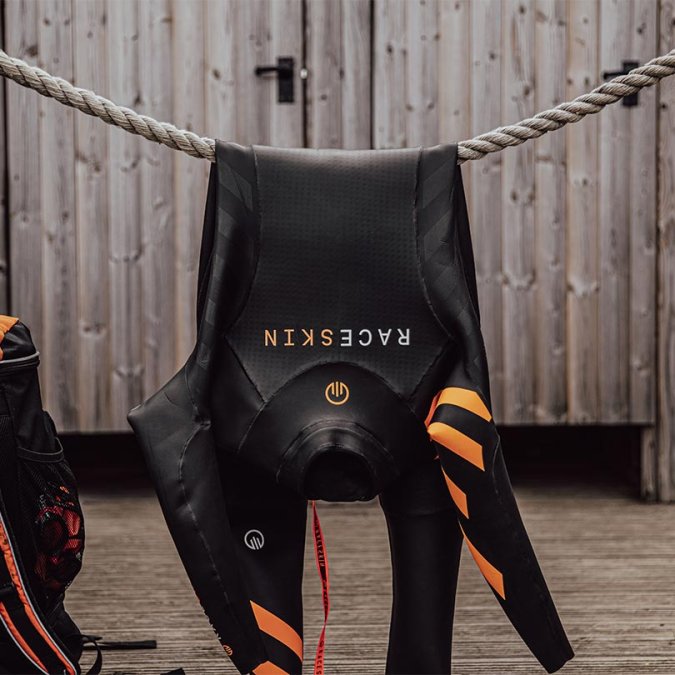
RS 02 drying post swim
Plan 6: How to Improve Shoulder Mobility for Swimming
Learning how to improve shoulder mobility for swimming comes down to consistency, not intensity. Tight shoulders shorten your reach and increase injury risk over a long season.
Try these three drills before every pool session:
- Band pull-aparts: 2 sets of 15, elbows straight.
- Wall slides: 2 sets of 10, keeping your lower back flat.
- Thoracic rotations: 8 each side, slow and controlled.
Plan 7: Race Day Preparation and Post-Swim Recovery
Most beginner plans end at the water's edge. This one does not. Race day is a logistics exercise wrapped around a swim, and the hours after you exit matter as much as the hours before you enter.
The Week Before: Taper, Kit Check, Course Recce
Cut your training volume by roughly a third in the final week while keeping the intensity light. You are not going to gain fitness in seven days, but you can easily arrive tired.
- Wetsuit, checked for nicks and seam damage
- Goggles, with a spare pair in the bag
- Two swim caps (one for warmth, one as backup)
- Safety buoy, inflated and tethered
- Towel, warm layers, flip-flops, and a bin bag for wet kit
- Earplugs and nose clip if you use them
- A snack and a warm drink for after
Managing Pre-Race Anxiety and Panic in Deep Water
This is the part competitors skip, and it is the part that sinks more beginner races than poor fitness. Panic in open water is not a character flaw. It is a predictable response to cold, depth, low visibility, and a crowd of thrashing limbs.
A few things that genuinely help:
- Rehearse the first 200 metres. In training, practise a controlled start: enter, float, breathe out, then begin swimming easy. Do the same thing on race day.
- Start at the back of your wave. You will lose a few seconds and gain a calm first minute. That trade is almost always worth it.
- Have a reset routine. If your breathing spikes, roll onto your back, float, and count five slow exhales. Then resume. Practise this in training so it is automatic.
- Name the sensation. Beginners who can say "this is cold water shock, it passes in under a minute" recover faster than those who read the feeling as danger.
- Use a tow float. It is visible, it is a rest point, and for many beginners it is the difference between entering the water and staying on the bank.
Post-Swim Recovery for Beginners
Recovery starts the moment you stand up. Wading out of water uses different muscles than swimming, and most beginners lose more time in the final 50 metres than in the entire first kilometre.
- Get out of wet kit fast. Neoprene continues to draw heat from your body once you stop moving.
- Warm the core before the limbs. Layers, hat, and a warm drink beat a hot shower on cold hands.
- Refuel within 30 minutes. Something with carbohydrate and a little protein. A flask of soup and a banana is as good as anything marketed to athletes.
- Rehydrate. You sweat in cold water even when you do not notice it.
- Walk for 10 minutes. Gentle movement helps rewarming and flushes the legs after a long wade.
- Log the session. Note water temperature, distance, how you felt at the 10-minute mark, and what you would change. Beginners who keep a log progress noticeably faster than those who do not.
The Day After
Expect to feel flat. Cold water swimming is metabolically expensive, and a first race often leaves beginners more tired than the distance suggests. Take an easy day, eat properly, and do not schedule a hard pool session for at least 48 hours. If you shivered for more than an hour after the race, or felt confused or unusually clumsy, treat it as a warning and shorten your next cold session.
Frequently Asked Questions
What is the 80/20 swimming rule?
The 80/20 rule means roughly 80% of your training volume sits at an easy, conversational pace, with only 20% at hard effort. For open water swimming beginners, this builds aerobic capacity without burning out. Most of your sessions should feel comfortable, with short bursts of race pace or interval training mixed in once a week. It is a sustainable way to grow training volume while protecting recovery.
How do I transition from pool swimming to open water?
Start with indoor-to-outdoor drills: practise sighting every 6-8 strokes in the pool, remove lane ropes for turns, and swim without pushing off the wall. Then move to a supervised open water venue and keep sessions short, around 15-20 minutes. Build up gradually as open water confidence grows. Cold water, no black line and chop all demand different skills, so treat the first few sessions as technique practice rather than fitness work.
What safety equipment is essential for beginner open water swimmers?
A brightly coloured swim cap, well-fitting goggles and a tow float or safety buoy are the basics. A wetsuit adds buoyancy and warmth, which matters in colder water temperatures. Never swim alone, check the venue's rules and always tell someone your route and expected finish time. If you are new to cold water, enter slowly and watch for signs of cold water shock or hypothermia.
How long should a beginner's open water swim session last?
Aim for 15-30 minutes in the water at first, depending on water temperature and your experience. In cold water, shorter is safer; even 10 minutes can be enough while you acclimatise. As your endurance and open water confidence build, extend sessions by 5 minutes at a time. Always exit before you feel truly cold, and warm up properly afterwards.
What are the best ways to acclimatise to cold water?
Build up exposure gradually with short, supervised dips, entering slowly and breathing steadily to manage the cold water shock response. Wearing a well-fitted wetsuit helps retain warmth and buoyancy. Repeat short sessions several times a week rather than one long one. Never swim alone in cold water, and get out if you start shivering uncontrollably or feel disoriented.
Open water racing rewards preparation more than raw fitness, and the right kit removes a variable you should not have to think about. Raceskin builds wetsuits and swim apparel tested in real training and racing conditions, with a dedicated designer for custom club and team orders and a direct feedback loop with elite athletes. Get race ready with Raceskin and start your season with gear that works as hard as you do.